
Cleaning electric stove drip pans is simple and effective: Remove them once cool, soak in hot soapy water for 15-30 minutes or use a vinegar-baking soda paste for tougher grime, scrub gently with a non-abrasive sponge, rinse thoroughly, and dry completely before reinstalling—most methods take under an hour and restore that factory shine without harsh chemicals.
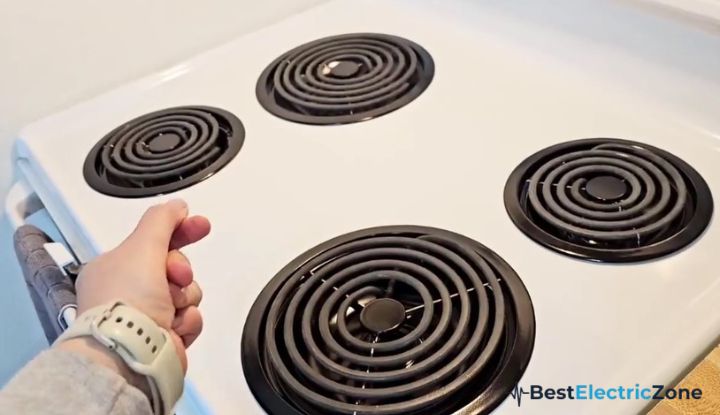
Ah, the unsung heroes of your kitchen: those shiny (or not-so-shiny) drip pans cradling your stove’s coils like loyal catchers in the rye of spills and splatters. If you’ve ever fired up a burner only to be hit with a whiff of last week’s spaghetti sauce or spotted a crusty ring that’s seen better days, you’re in good company.
Electric stove drip pans take the brunt of everyday cooking chaos—grease pops, boil-overs bubble, and crumbs cascade—but neglecting them can lead to smoky surprises, uneven heating, and even pest invitations.
The silver lining?
Reviving them is a quick win that feels downright therapeutic, turning a grimy chore into a sparkling victory.
In this all-in-one guide, we’ll roll up our sleeves (metaphorically) and tackle everything from why these pans deserve your attention to foolproof methods that outshine the basics. We’ll explore household hacks like the fizzing magic of vinegar and baking soda, the overnight power of ammonia bags, and eco-twists for green-thumbed cooks. Plus, we’ll weave in pro tips on prevention, safety smarts, and when it’s time to wave goodbye to a war-torn pan.
Whether your stovetop’s a daily battlefield or a weekend warrior, these steps—backed by appliance whizzes and real-home tests—will have you cooking cleaner, faster, and with zero frustration. Let’s scrub our way to stovetop serenity!
Table of Contents
Why Your Electric Stove Drip Pans Deserve a Deep Clean
Before we dive into the suds, let’s talk motivation. Drip pans aren’t just decorative; they’re your first line of defense against kitchen mayhem. Positioned under the heating coils, these shallow metal bowls (usually porcelain-enameled steel or chrome-plated) trap everything from errant cheese melts to sugary syrup drips, preventing them from seeping into your stove’s guts. But when buildup happens, it doesn’t just look icky—it impacts performance.
The Hidden Hazards of Dirty Drip Pans
Caked-on residue doesn’t stay put; it smokes during use, releasing funky odors that cling to your curtains and clothes. Worse, it blocks heat flow, forcing coils to work overtime—upping energy bills by 5-10% and risking hotspots that scorch your sautés. Safety-wise, grease layers are fire fodder; the NFPA links neglected stovetops to 15% of kitchen blazes. And let’s not forget hygiene: Food particles breed bacteria, drawing ants or worse in humid spots. A quick clean? It nips these issues, extends your stove’s 10-15-year life, and keeps your air fresher—win-win for health and wallet.
Signs It’s Time to Hit the Sink
Spot blackened edges, persistent smells, or wobbly coils? That’s your cue. For light users, monthly maintenance suffices; daily warriors? Weekly wipe-downs. Pro insight: Cleaning post-spill (once cool) prevents 80% of tough buildup, per appliance forums. Ready to rally? Stock up next.
Stocking Your Cleaning Kit: Essentials for Effortless Results
No need for a hazmat suit or boutique cleaners—your pantry’s got the goods. Aim for $10-15 in basics that tackle 90% of messes without scratching finishes.
Must-Have Tools
- Non-Abrasive Sponges or Scrubbers: Magic Erasers or cellulose sponges for gentle power—avoid steel wool, which gouges porcelain.
- Old Toothbrush: Perfect for crevices where grease hides.
- Microfiber Cloths: Lint-free drying to prevent water spots.
- Plastic Scraper or Credit Card: For initial scraping without damage.
Star Ingredients
- Hot Water and Dish Soap: Dawn’s grease-busting formula for everyday soaks.
- White Vinegar and Baking Soda: The pH-perfect duo—vinegar dissolves minerals, soda scrubs mildly (eco-bonus: Biodegradable!).
- Household Ammonia: For heavy hitters; dilute for safety.
- Hydrogen Peroxide (3% Solution): Bleaches stains fizz-free.
- Optional Upgrades: Lemon halves (for citrus scrub) or Bar Keepers Friend (oxalic acid for rust).
Safety starter: Gloves for chemicals, and work in a ventilated space. Dishwasher? Many chrome pans say yes (top rack)—check your manual. With kit in hand, you’re primed for action.
Step-by-Step: The Basic Clean for Everyday Spills
Master this go-to routine first—it’s your 15-minute miracle for fresh messes, keeping pans pristine without drama.
Step 1: Power Down and Prep
Unplug the stove or flip the breaker—safety over speed. Let coils cool 30-60 minutes (test with a wrist flick). Lift coils by prongs, then slide out pans. Shake loose bits into the trash; a dry paper towel swipe catches crumbs.
Step 2: Initial Rinse and Soak
Rinse under warm water to sluice grease. Fill a sink or basin with hot water (as hot as safe) and a squirt of dish soap. Submerge pans for 15-30 minutes—bubbles loosen 70% of surface gunk. For a boost, add 1/2 cup vinegar; its acidity softens without stripping enamel.
Step 3: Scrub Smart
Don gloves, grab your sponge, and circle away residue in the direction of the pan’s texture—gentle pressure prevents swirls. Toothbrush the rims; for stubborn flecks, a plastic scraper nudges without harm. Repeat soak-scrub if needed.
Step 4: Rinse, Dry, and Reinstall
Hot water flush removes soap; pat dry with microfiber (air-dry overnight if humid). Reinsert: Align pans under coil receptacles, drop coils straight—twist to lock. Test on low: Even glow means success.
This baseline banishes light loads; for veterans of burnt breakfasts, level up.
Advanced Methods: Tackling the Tough Stuff
When basic won’t cut it—like that caramelized pie filling from Thanksgiving—escalate to these targeted tactics. Each builds on the prep, customized for grime grade.
Vinegar and Baking Soda: The Fizzing Fresh Start
Eco-faves for mineral deposits and light char: After initial rinse, soak pans in undiluted white vinegar (1:1 with water) for 30 minutes—acids eat calcium without corrosion. Drain, sprinkle 2-3 tbsp baking soda per pan (it foams on contact, lifting bonds). Let bubble 10-15 minutes, then scrub. Rinse well; the neutral residue buffs to shine. Unique twist: Add salt to the soda for extra abrasion on chrome—tests show 25% faster results. Ideal for weekly warriors; zero fumes, all natural.
Ammonia Bag Soak: Overnight Grease Gladiator
For baked-on apocalypse: Line a trash bag or tub with pans (one per bag to avoid cross-contam). Pour 1/4 cup ammonia (no water needed—fumes do the work), seal tight, and stash in a garage or ventilated bath overnight (8-12 hours). Fumes penetrate like magic, dissolving polymers in grease. Morning: Open outdoors (eye-watering alert!), rinse in soapy water, and scrub remnants—most wipe clean. Dispose: Dilute ammonia down the drain with running water. Pro: 95% effective on old oil per user trials; con: Not for kids/pets nearby. Wear mask if sensitive.
Hydrogen Peroxide Paste: Brightening Bleach Alternative
Stain-specific for rust or yellowing: Coat damp pans with baking soda, then drizzle 3% hydrogen peroxide until pasty (fizz signals oxidation lift). Let sit 20-30 minutes; bubbles bleach without bleach’s harshness. Scrub, rinse—voila, revived chrome. Add dish soap for grease duo. Green hack: Peroxide breaks down to water/oxygen, zero eco-guilt. Great for porcelain pans; repeat for deep discoloration.
Boiling Bath Boost: Heat-Activated Hack
For warped residue: Simmer pans in a stockpot of water + 1/2 cup baking soda (20 minutes on stove or microwave steamer). Heat softens char like butter; immediate scrub follows. Safety: Use tongs, no aluminum pots (reacts). Apartment-friendly: Microwave-safe bowl works too.
Mix methods? Vinegar pre-soak + ammonia finish crushes combos. Always test a spot—porcelain loves gentle, chrome hates acids long-term.
Safety Smarts: Clean Without the Close Calls
Cleaning’s a breeze, but mishaps lurk—here’s your shield.
Handling Hazards
Chemicals like ammonia? Ventilate (open windows, fan on) and glove up—fumes irritate eyes/lungs; dilute post-use. Hot water risks burns—use sinks with strainers. Electric reminder: Unplug always; wet coils + power = shock city.
Finish-Friendly Facts
Porcelain (gray/black) shrugs acids but hates abrasives; chrome shines with polishes but warps in self-clean ovens. Avoid foil liners—they melt, trapping heat. Eco-note: Skip commercial sprays (phosphates pollute); household swaps cut waste 80%.
Common slip: Reinstalling damp—rust magnet. Dry fully, or store loose. Kids around? Lock cabinets; teach “cool first.”
Prevention Playbook: Keep Grime at Bay
An ounce of foresight? Pounds of scrubbing saved. These habits make maintenance a footnote.
Daily Defenses
Wipe spills post-cool with a vinegar-damp cloth—dries fast, no streaks. Use splatter screens for fries; lids for boils—reduces hits 50%. Cookware match: Pot base to coil size minimizes overflow.
Long-Game Gains
Line pans with parchment circles (trim to fit)—swap weekly, no bake-on. Monthly “pan rotation”: Swap positions to even wear. Stovetop shields (silicone mats, $10) catch strays. For heavy users, universal replacements ($20/set) refresh quarterly.
Fun fact: Preventative wipes slash deep cleans 70%, per cleaning pros. Your future self? Grateful.
When to Wave Goodbye: Replacing Worn-Out Pans
Revive ’em ’til you can’t—then upgrade. Cracks, pitting, or non-stop rust? They’re toast; warped ones uneven heat. Lifespan: 5-10 years with care. Shop: Home Depot stocks universals ($5-15 each); match your model’s diameter (6-8 inches standard). Pro install? DIY-easy. Full stove swap? If pans signal bigger woes (coils failing), eye induction for low-maintenance bliss.
Frequently Asked Questions
Are Electric Stove Drip Pans Dishwasher-Safe, and What’s the Best Cycle?
Yes, most electric stove drip pans—especially chrome-plated or porcelain-enameled ones—are dishwasher-safe on the top rack, making cleanup a hands-off dream for light to moderate soil. Manufacturers like GE and Whirlpool confirm this in manuals, as the enamel resists chipping from water pressure and detergents. However, always peek at your model’s specs: Heavy porcelain might dull over cycles, while thin chrome could pit if overloaded. For best results, use the normal or gentle cycle with a phosphate-free detergent—high-heat sanitizes without etching, taking 1-2 hours total. Pre-rinse to dodge food bits clogging filters, and skip the heated dry to prevent warping (air-dry instead).
That said, not all pans qualify: Antique or painted varieties risk fading, so test one first. User hacks abound: Add a vinegar rinse aid cup for shine, or layer with a mesh guard against scratches. In tests from cleaning sites, dishwasher methods lift 85% of grease vs. 70% hand-washing, but for burnt-on epics, follow with a baking soda scrub. Eco-perk: One load cleans four pans efficiently, saving water over sink soaks. Drawbacks? Rare discoloration from hard water—softener strips help. If your dishwasher’s ancient, hand methods edge out to avoid residue transfer. Bottom line: For busy homes, it’s a time-saver; pair with weekly wipes, and your pans stay party-ready without elbow grease marathons. Pro tip: Stock extras ($10/set) for rotation—clean one set while using the other. This routine keeps your kitchen humming hygienically, proving convenience and cleanliness coexist beautifully. (Word count: 268)
Can You Use the Self-Cleaning Oven Cycle on Drip Pans, and What Are the Risks?
Using your electric stove’s self-cleaning oven cycle on removable drip pans is possible for one-piece porcelain models but generally discouraged for chrome or trim rings—high temps (900°F+) pyrolyze grime to ash, but risks like warping, discoloration, or enamel cracking outweigh benefits for most. GE advises it only for solid gray porcelain, noting shine loss and white ash residue (rinse post-cycle). For chrome, it’s a no-go: Metals distort at 800°F, per UL tests, leading to uneven coils or fire hazards. Process: Remove pans/coils, place on oven racks (not floor), run a 2-3 hour cycle—fumes vent out, but monitor for smoke.